
“The following page is used with permission from:
http://aaybee.com.au/Magnabend/Magnabend_Homepage.html ” Thank you to Alan Stuart Bottomley (the magnabend’s inventor) Permission to Use Magnabend Website Material.
There are numerous ways of laying-out boxes and numerous ways of folding them up. The MAGNABEND is ideally suited to forming boxes, especially complex ones, because of the versatility of using short clampbars to form folds relatively unhindered by previous folds.
Plain Boxes
Make the first two bends using the long clampbar as for normal bending.
Select one or more of the shorter clampbars and position as shown. (It is not necessary to make up the exact length as the bend will carry over gaps of at least 20 mm between the clampbars.)
For bends up to 70 mm long, just select the largest clamp piece that will fit.
For longer lengths it may be necessary to use several clamp pieces. Just select the longest clampbar that will fit in, then the longest that will fit in the remaining gap, and possibly a third one, thus making up the required length.
For repetitive bending the clamp pieces may be plugged together to make a single unit with the required length. Alternatively, if the boxes have shallow sides and you have available a slotted clampbar, then it may be quicker to make the boxes in the same manner as shallow trays.
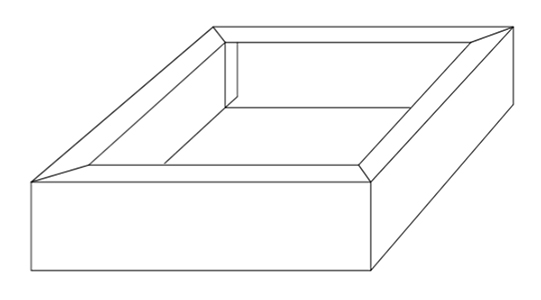
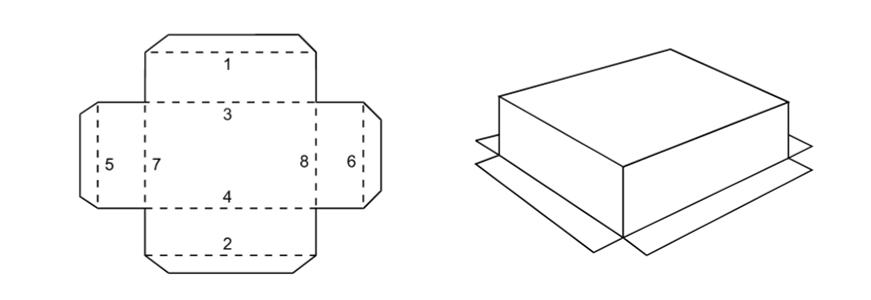
Lipped boxes
Lipped boxes can be made using the standard set of short clampbars provided one of the dimensions is greater than the width of the clampbar (98 mm).
1. Using the full-length clampbar, form the length wise folds 1, 2, 3, &4.
2. Select a short clampbar (or possibly two or three plugged together) with a length at least a lip-width shorter than the width of the box (so that it may later be removed). Form folds 5, 6, 7 & 8.
While forming the folds 6 & 7, be careful to guide the corner tabs either inside or outside the sides of the box, as desired.
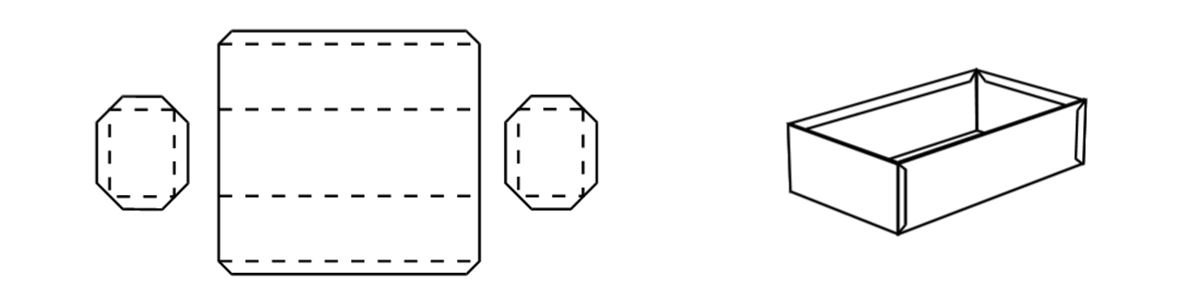
Boxes with separate ends
A box made with separate ends has several advantages:
- it saves material especially if the box has deep sides,
- it does not require corner notching,
- all cutting-out can be done with a guillotine,
- all folding can be done with a plain full-length clampbar;
and some drawbacks:
- more folds must be formed,
- more corners must be joined, and
- more metal edges and fasteners show on the finished box.
Making this kind of box is straight forward and the full-length clampbar can be used for all folds.
Prepare the blanks as shown below.
First form the four folds in the main workpiece.
Next, form the 4 flanges on each end piece.
For each of these folds, insert the narrow flange of the end piece under the clampbar.
Join the box together.
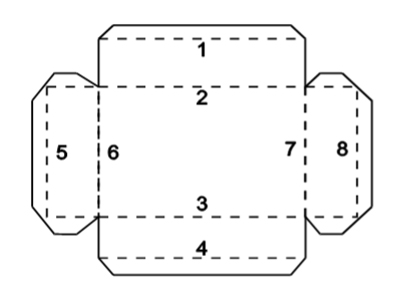
Flanged boxes with plain corners
Plain cornered boxes with outside flanges are easy to make if the length and width are greater than the clampbar width of 98 mm.
Forming boxes with outside flanges is related to making TOP-HAT SECTIONS (described in a later section)
Prepare the blank.
Using the full-length clampbar, form folds 1, 2, 3 & 4.
Insert the flange under the clampbar to form fold 5, and then fold 6.
Using appropriate short clampbars, complete folds 7 & 8.
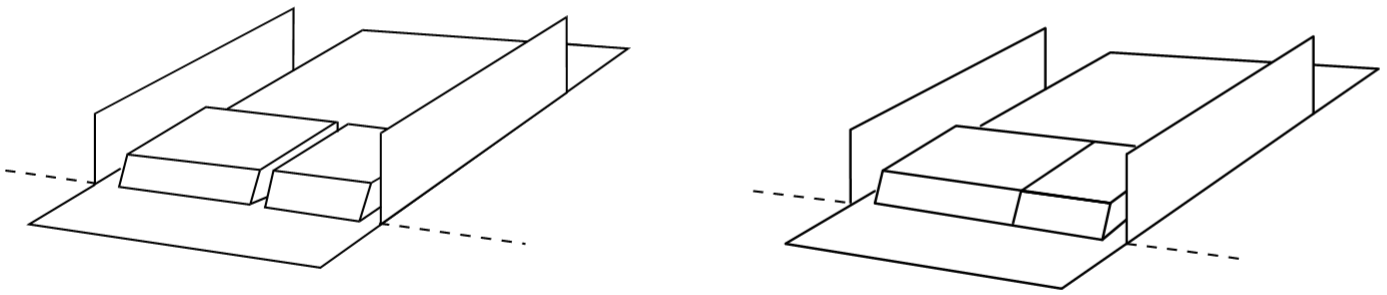
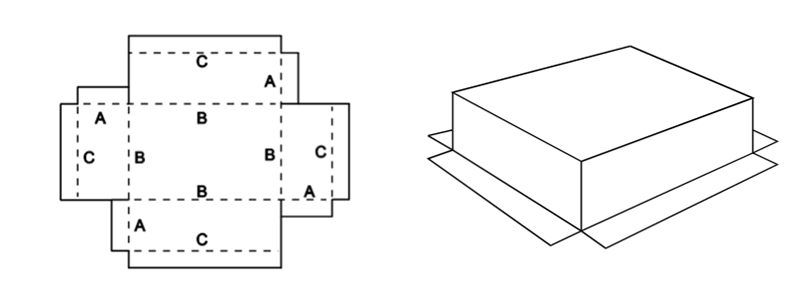
Flanged Box with Corner Tabs
When making an outside flanged box with corner tabs and without using separate end pieces, it is important to form the folds in the correct sequence.
Prepare the blank with corner tabs arranged as shown.
At one end of the full-length clampbar, form all tab folds "A" to 90. It is best to do this by inserting the tab under the clampbar.
At the same end of the full-length clampbar, form folds "B" to 45° only. Do this by inserting the side of the box, rather than the bottom of the box, under the clampbar.
At the other end of the full-length clampbar, form the flange folds "C" to 90°.
Using appropriate short clampbars, complete folds "B" to 90.
Join the corners.
Remember that for deep boxes it may be better to make the box with separate end pieces.
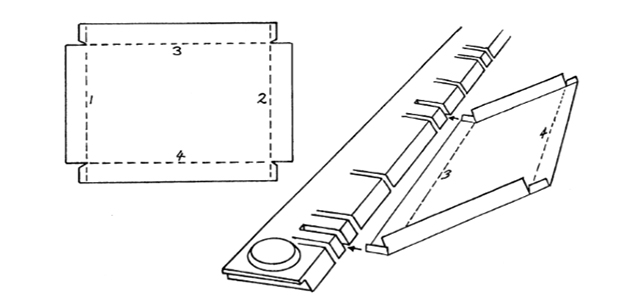
FORMING TRAYS USING THE SLOTTED CLAMPBAR
The Slotted Clampbar, when supplied, is ideal for making shallow trays and pans quickly and accurately.
The advantages of the slotted clampbar over the set of short clampbars for making trays are that the bending edge is automatically aligned to the rest of the machine, and the clampbar automatically lifts to facilitate the insertion or removal of the workpiece. Never-the-less, the short clampbars can be used to form trays of unlimited depth, and of course, are better for making complex shapes.
In use, the slots are equivalent to gaps left between the fingers of a conventional box & pan folding machine. The width of the slots is such that any two slots will fit trays over a size range of 10 mm, and the number and locations of the slots are such that for all sizes of tray, there can always be found two slots that will fit it. (The shortest and longest tray sizes the slotted clampbar will accommodate are listed under SPECIFICATIONS.)
To fold up a shallow tray:
Fold-up the first two opposite sides and the corner tabs using the slotted clampbar but ignoring the presence of the slots. These slots will not have any discernible effect on the finished folds.
Now select two slots between which to fold-up the remaining two sides. This is actually very easy and surprisingly quick. Just line-up the left side of the partly made tray with the leftmost slot and see if there is a slot for the right side to push into; if not, slide the tray along till the left side is at the next slot and try again. Typically, it takes about 4 such tries to find two suitable slots.
Finally, with the edge of the tray under the clampbar and between the two chosen slots, fold up the remaining sides. The previously formed sides go into the selected slots as the final folds are completed.
With tray lengths that are nearly as long as the clampbar it may be necessary to use one end of the clampbar in lieu of a slot.
op-Hat Profiles
The Top-Hat profile is so-named because its shape resembles a top-hat of the kind that was worn by English gentlemen in past centuries:
English TopHat TopHat image

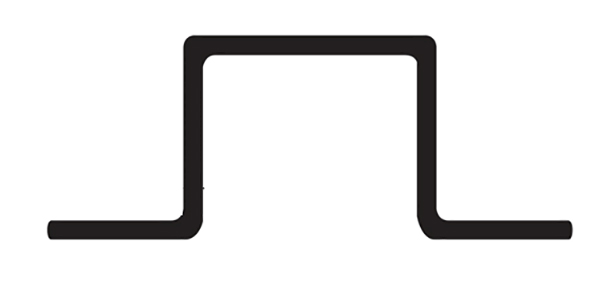
Top-hat profiles have numerous uses; common ones being stiffening ribs, roof purlins and fence posts.
Top-hats can have square sides, as shown below on the left, or tapered sides as shown on the right:
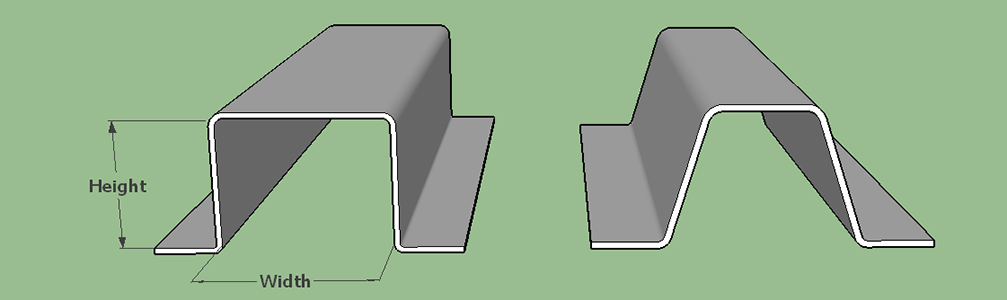
A square-sided top hat is easy to make on a Magnabend provided that the width is more than the width of the clampbar (98mm for the standard clampbar or 50mm for the (optional) narrow clampbar).
A top hat with tapered sides can be made much narrower and in fact its width is not determined by the width of the clampbar at all.
Tophats-joined
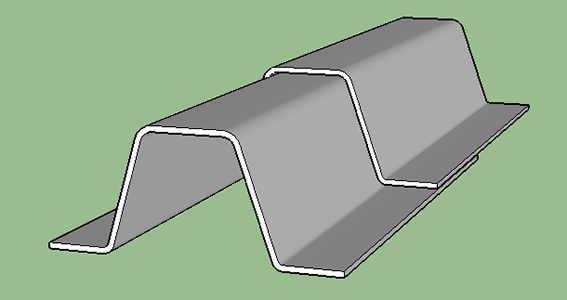
An advantage of tapered top-hats is that they can be lapped over each other and joined to make longer sections.
Also, this style of top-hat can nest together thus making a very compact bundle to facilitate transport.
How to make top-hats:
Square-sided top-hats can be made as shown below:
If the profile is more than 98mm wide then the standard clampbar can be used.
For profiles between 50mm and 98 mm wide (or wider) the Narrow Clampbar can be used.
A very narrow top-hat can be made using an auxiliary square bar as shown below on the right.
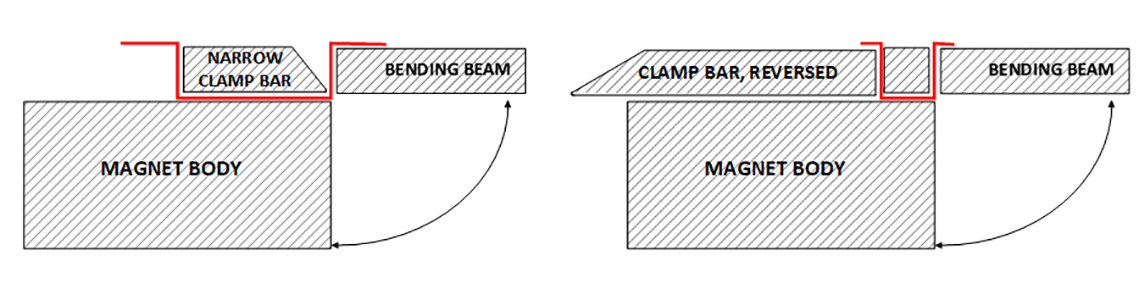
When using these techniques the machine will not have its full bending thickness capacity and thus sheetmetal up to about 1mm thick only can be used.
Also, when using a square bar as auxiliary tooling it will not be possible to overbend the sheetmetal to allow for springback and thus some compromise may be necessary.
Tapered top-hats:
If the top hat can be tapered then it can be formed without any special tooling and the thickness can be up to the full capacity of the machine (1.6mm for top-hats over 30mm deep or 1.2mm for top-hats between 15mm and 30mm deep).
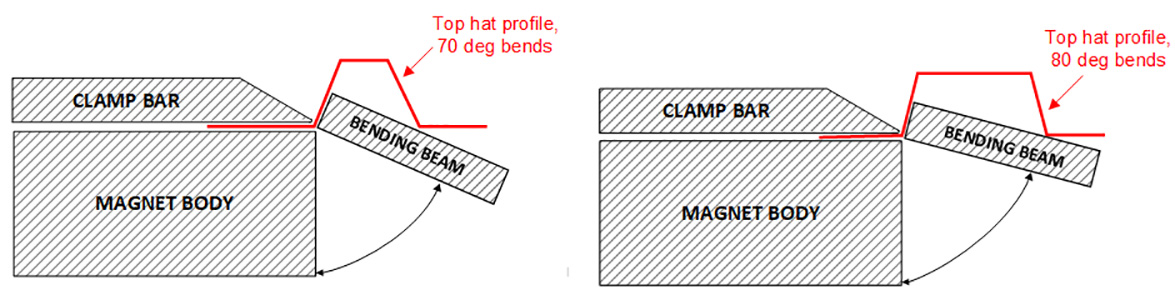
The amount of taper needed depends on the width of the top-hat. Wider top-hats can have steeper sides as shown below.
For a symetrical top-hat all 4 bends should be made to the same angle.
Height of Top-Hat:
There is no upper limit to the height that a top-hat can be made but there is a lower limit and that is set by the thickness of the bending beam.
With the Extension Bar removed the bending beam thickness is 15mm (left drawing). The thickness capacity will be about 1.2mm and the minimum height of a top-hat will be 15mm.
With the Extension Bar fitted the effective bending beam width is 30mm (right drawing). The thickness capacity will be about 1.6mm and the minimum height of a top-hat will be 30mm.

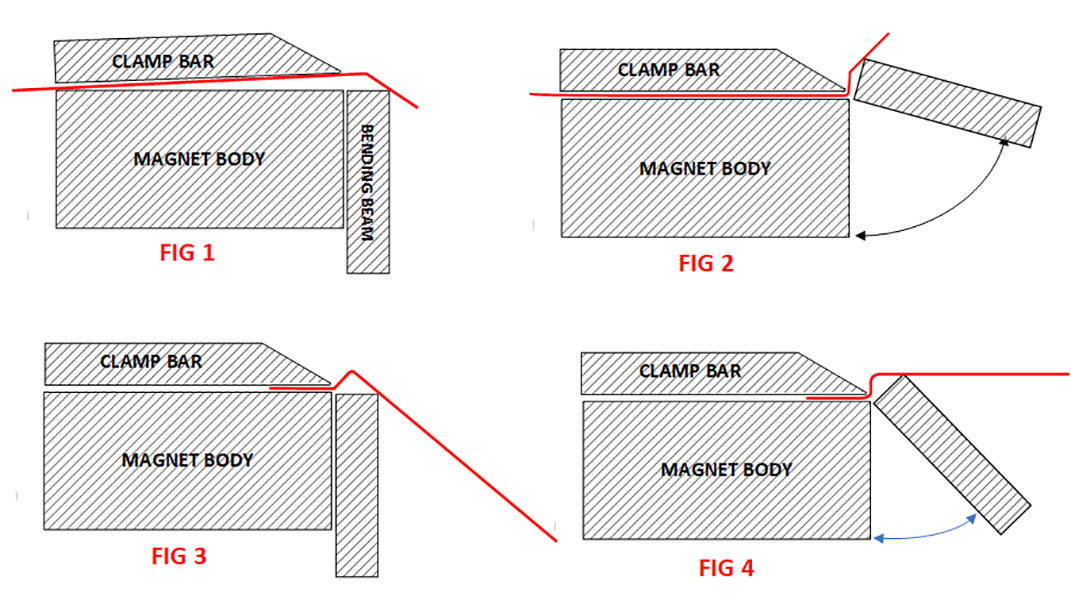
Making very close Reverse Bends:
Sometimes it can be very important to be able to make reverse bends closer together than the theoretical minimum set by the thickness of the bending beam (15mm).
The following technique will achieve this although the bends may be a little rounded:
Remove the extension bar from the bending beam. (You need it as narrow as possible).
Make the first bend to about 60 degrees and then reposition the workpiece as shown in FIG 1.
Next make the second bend to 90 degrees as shown in FIG 2.
Now turn the workpiece around and position it in the Magnabend as shown in FIG 3.
Lastly complete that bend to 90 degrees as shown in FIG 4.
This sequence should be able to achieve reverse bends down to about 8mm apart.
Even closer reverse bends can be achieved by by bending thru smaller angles and applying more successive stages.
For instance make bend 1 to only 40 degrees, then bend 2 to say 45 degrees.
Then increase bend 1 to say 70 degrees, and bend 2 to say 70 degrees also.
Keep repeating until the desired result is achieved.
It is easily possible to achieve reverse bends down to only 5mm apart or even less.
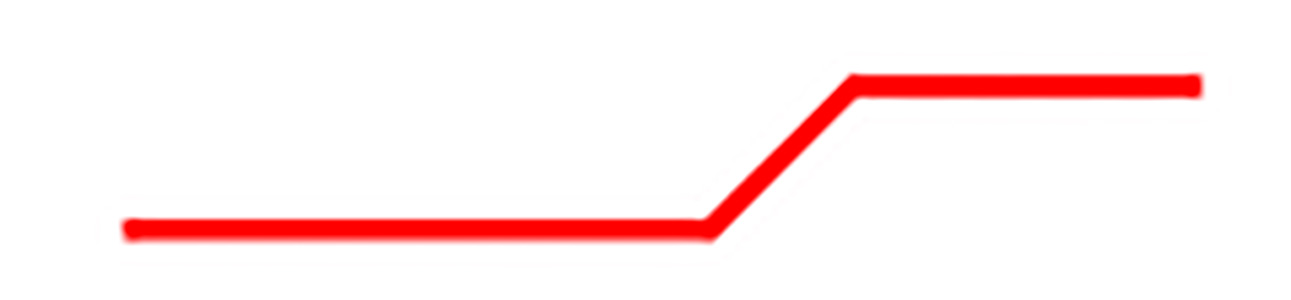
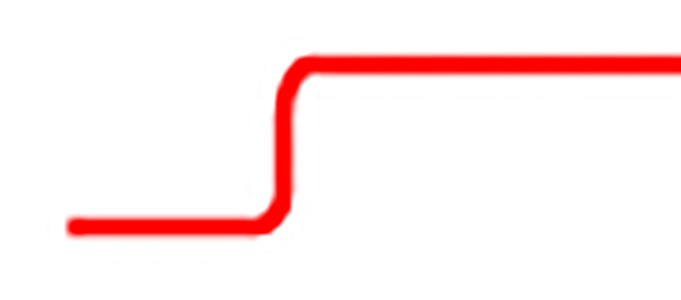
Also, if it is acceptable to have a sloping offset like this:jogglerather than this: Joggle 90 degthen fewer bending operations will be needed.
Post time: Apr-14-2020